Some might say that if you want to develop front-end applications all you need is HTML, CSS, and JavaScript, right?
Well, if you want to develop a simple website the above statement may be right, but for any modern and complex web application that just simply not true.
Of course, the end result will definitely be HTML, CSS, and Javascript, because that is what modern browsers understand, but there are a whole bunch of intermediate steps along the way.
You want a solid view layer?; you might use React, Vue, or Svelte. You might throw Sass in the mix, or TypeScript when your web application gets more complicated, or use gazillion other modules with different module syntaxes, different cross-browser support, and so on.
Module bundlers and transcompliers to the rescue; and this when you get a complex front-end build pipeline, and this is why most developers I know dislike front-end development.
Prerequisites
Before you venture any further, I assume that you have a solid grasp on module bundlers, worked with Webpack before, know the reasoning behind it, and finally, you understand what are the differences between module systems such as CJS, UMD, ESM, etc.
If you don't know these things, no sweat, I will go through the definitions very quickly below.
On Module Bundlers
All a module bundler does at a very high level, as the name suggests, it bundles up your code, usually for browsers to execute. It maintains a dependency graph of your various dependencies and their dependencies to know how to merge things together.
It takes your source code files, merges them with 3rd party modules creating a single large file, or smaller files, called chunks, depending on how it's configured.
A bundler will also execute many intermediary steps to reach the final bundle file such as executing a transpiler like Babel which makes sure that your source code and all your 3rd party dependencies are backward compatible with older browsers, or can include a JavaScript minifier as the last step in the bundling process.
Taking the example of Webpack, the most unusual thing a front-end developer sees first is that not only JavaScript files can be bundled together, but any file that is defined in the import statement in the source code, like HTML, CSS, SVG, or images.
This is not native to JavaScript or ESM, it's a Webpack feature.
import React from 'react'
import bgImage from 'assets/images/background.jpg'

export default function Login() {
  return (
    <div style={{backgroundImage: `url(${bgImage})`}}>
      ...
    </div>
  )
}
Webpack knows this because it has "rules" defined for each file type, executing one or more intermediary steps (e.g. loaders) to transform and bundle that particular file type together with other parts of the application.
All these are defined in a complex configuration file, although recent versions of Webpack came a long way in making the configuration more simple, nevertheless, a developer should know the ins and outs of Webpack to take advantage of it.
This learning curve is steep and can be overwhelming for new developers.
Snowpack, a Different Approach
The Third Age of JavaScript is about ESM.
-- Fred K. Schott @fredkschott
If you're working on large front-end projects, you'll notice that Webpack takes a bit of time to bundle everything together, because, on every code change, it will take the entire project and re-bundle it from scratch.
Enter, Snowpack. It uses a different approach, some say, it is the next iteration of module bundlers.
This approach differentiates between the different environments the source code lives in (not to say Webpack doesn't). It builds all of the dependencies once and pushes them to the browser, leaving the code unbundled during development, and building the bundle for production only; if you want it to because Snowpack v3 default behavior is to use the same unbundled source code for production too.
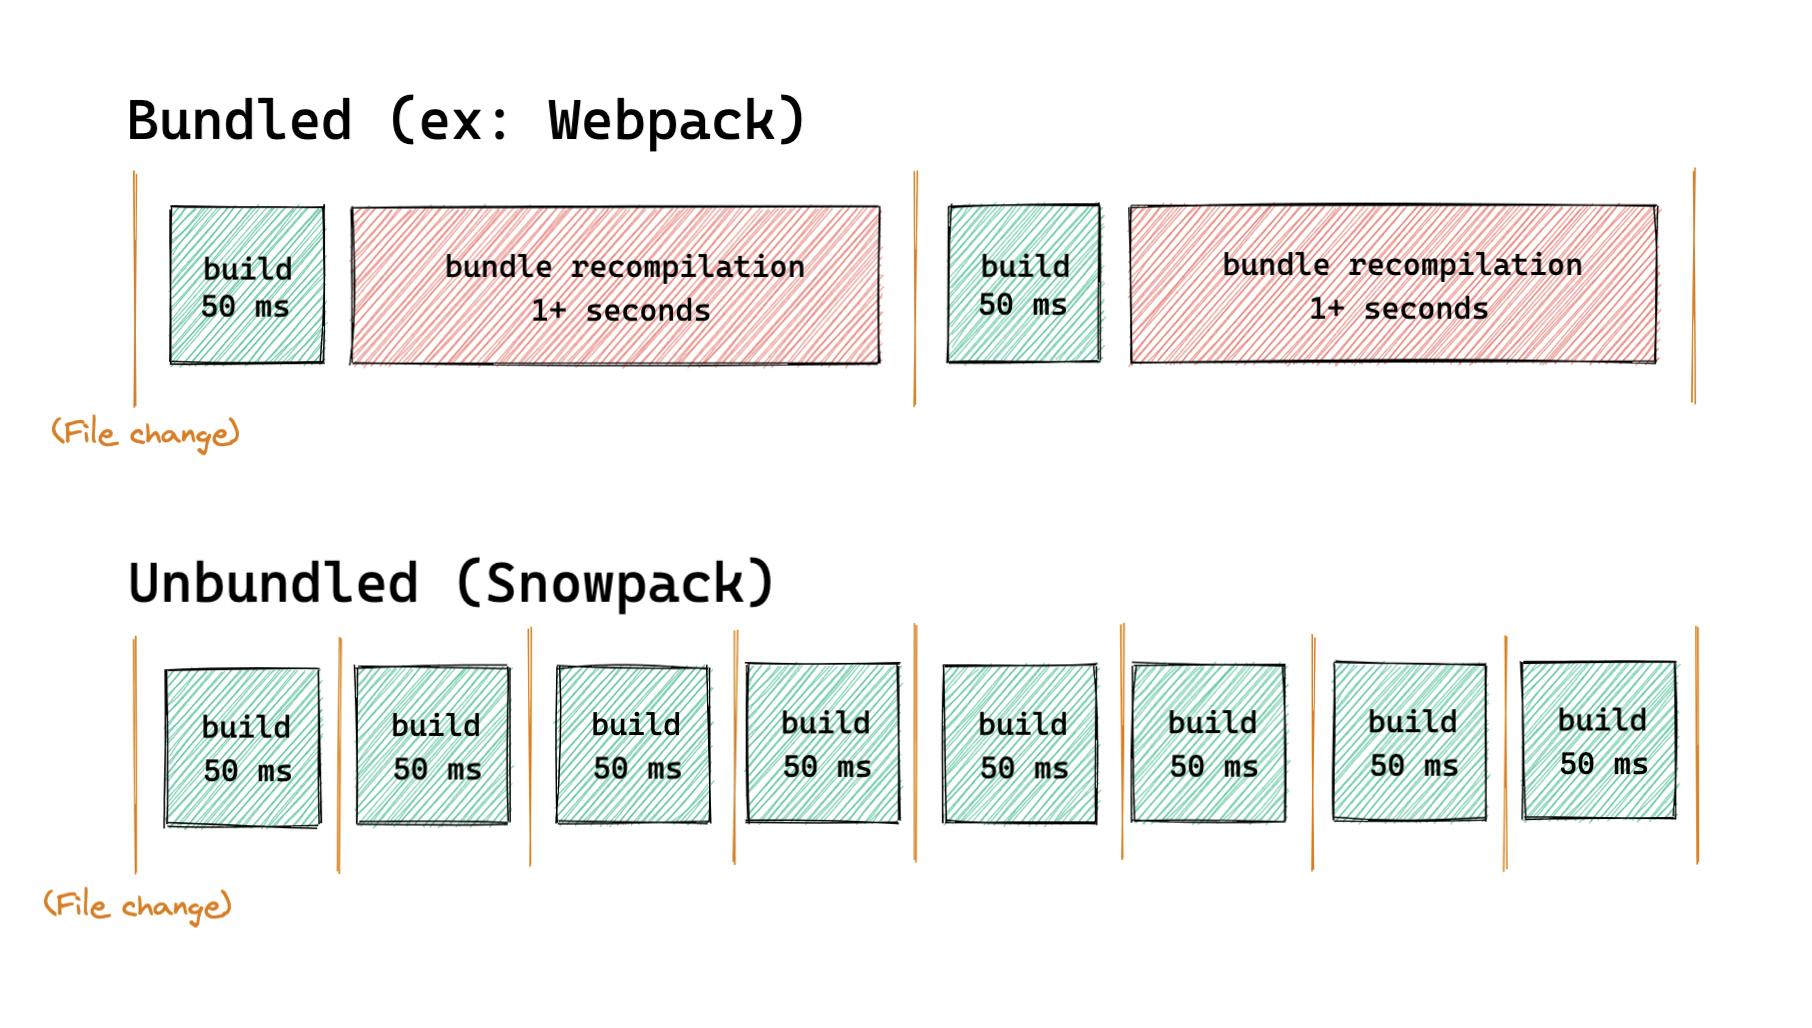
Image Source: https://www.snowpack.dev/concepts/how-snowpack-works
This is important mainly for large, complex projects, where it takes seconds or even minutes to recompile everything into the final build, even though the developer doesn't necessarily need production-ready, minified, and optimized code in development.
With this approach, Snowpack builds only one file on a code change and pushes it directly to the browser.
It can also include the usual intermediary steps like Babel, TypeScript, etc. but it does it for every file individually, taking advantage of browser caching. For example, a 3rd party dependency you may use in your code is built only once and pushed to the browser, cached, and never rebuilt unless it changes resulting in small build times.
Build a React App With Snowpack
To understand how to create a build pipeline with Snowpack, let's create a small React application that uses React Router to route to a specific page and that outputs some text to the DOM.
In the following examples, I will use yarn as the package manager, but you can just as easily use npm.
Create a project folder and a package.json file with yarn:
mkdir test-snowpack && cd test-snowpack
yarn init --yes
yarn add snowpack --dev
yarn add react react-dom react-router
This will initialize the project with yarn default values and add Snowpack, React, React DOM and React Router as a development dependency to it.
Now create a src folder on the same level as package.json and create an index.jsx and test-view.jsx files in it, then create another folder called public with an index.html file in it:
mkdir src
touch src/index.jsx
touch src/test-view.jsx

mkdir public
touch public/index.html
The contents of public/index.html should be:
<!doctype html>
<html lang="en">
  <head>
    <meta charset="utf-8" />
    <meta name="viewport" content="width=device-width, initial-scale=1" />
    <meta name="description" content="Test Snowpack" />
    <title>Test Snowpack</title>
  </head>

  <body>
    <div id="root"></div>
    <script type="module" src="/dist/index.js"></script>
  </body>
</html>
Contents of src/test-view.jsx:
//src/test-view.jsx
import React from 'react'

export default function TestView() {
  return (
    <div>Hello Snowpack!</div>
  )
}
Contents of src/index.jsx, just a simple React Router powered React app:
//src/index.jsx
import React from 'react'
import { render } from 'react-dom'
import { BrowserRouter as Router, Switch, Route } from "react-router-dom"
import TestView from './test-view.jsx'

render(
<React.StrictMode>
  <Router>
    <Switch>
      <Route path="/">
        <TestView />
      </Route>
    </Switch>
  </Router>
</React.StrictMode>,
document.getElementById('root')
)
Now we need to create a file called snowpack.config.js on the same level as package.json and the file contents should be:
module.exports = {
  mount: {
    "public": "/",
    "src": "/dist"
  }
}
This configuration file has a property called mount where we define the mapping between local directories to URLs. In this case, the public folder maps to / and the src folder to /dist therefore when we run the dev server (see below) and open localhost:8080/ it will load the HTML files from the public folder.
As you can see in the public/index.html file we're loading our index.js script from /dist/index.js, what this means that src/*.jsx will be loaded from the URL like so localhost:8080/dist/*.js.
To run the dev server and the build command, we need to modify the package.json file and add the following lines:
"scripts": {
    "dev": "snowpack dev",
    "build": "snowpack build",
  }
Now, by running yarn run dev it should fire up the project in the browser, in a separate tab, and see Hello Snowpack!. If it doesn't automatically load the browser tab then type localhost:8080 in a new tab.
If you inspect this in Chrome DevTools, you'll see that all our source code files and their dependencies are built and loaded separately as ESM modules.
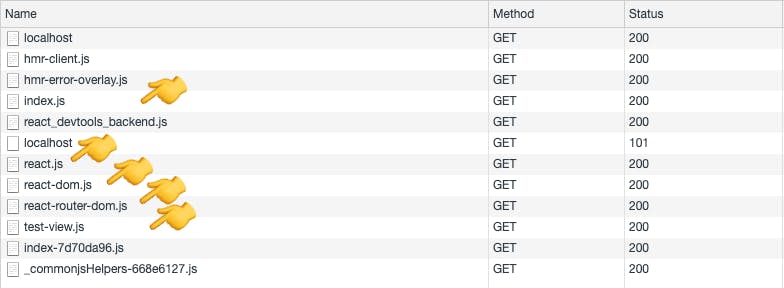
No need for React or other configurations, it just works out of the box, because Snowpack automatically detects JSX based on the .jsx file extension, in fact, it has built-in support for JSX, TypeScript, CSS, CSS modules, Images, and WASM (see https://www.snowpack.dev/reference/supported-files.
Adding Styles
Snowpack already has built-in support for CSS and CSS modules as mentioned above, it targets these files by their extension .css and .module.css respectively, but if you want to use Sass, for example, you can, but you need to use a plugin for that.
Let's add Sass to see how to configure Snowpack's plugins.
First, add the plugin to the project using yarn:
yarn add @snowpack/plugin-sass --dev
Then add this plugin to the snowpack.config.js file:
plugins: [
    [ '@snowpack/plugin-sass' ]
]
Yes, that's a multi-dimensional array and not a typo.
Let's create src/styles.scss file with the following contents:
/* src/styles.scss */
.container {
  padding: 20px;
  background: rgb(143, 143, 143);

  .content {
    padding: 20px;
    background: rgb(107, 191, 141);
  }
}
Finally, modify src/test-view.jsx to include the scss file and modify the function as well, here's the whole modified file:
// src/test-view.jsx
import React from 'react'

import './styles.scss';

export default function TestView() {
  return (
    <div className="container">
      <h1 className="content">Hello Snowpack!</h1>
    </div>
  )
}
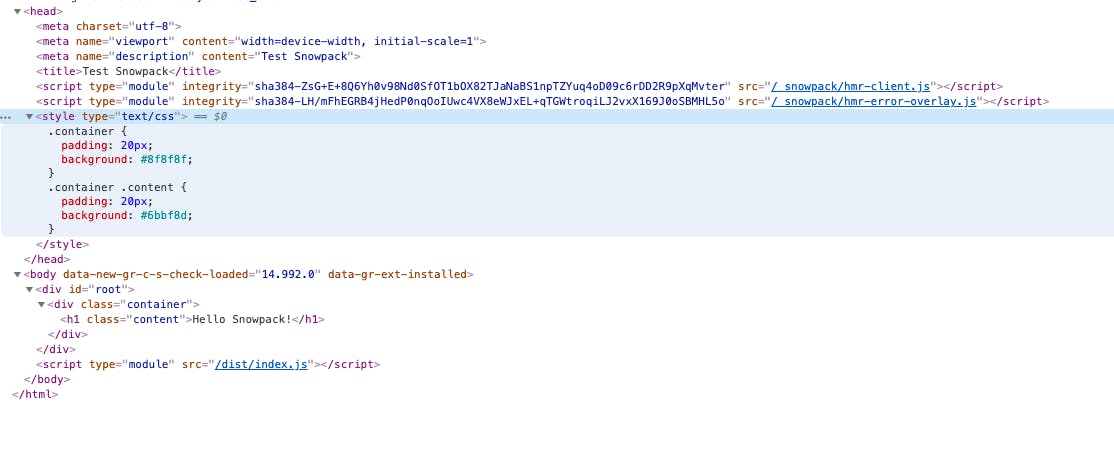
It's that simple, now, you can reload localhost:8080 and see the page being updated. It should look like this:
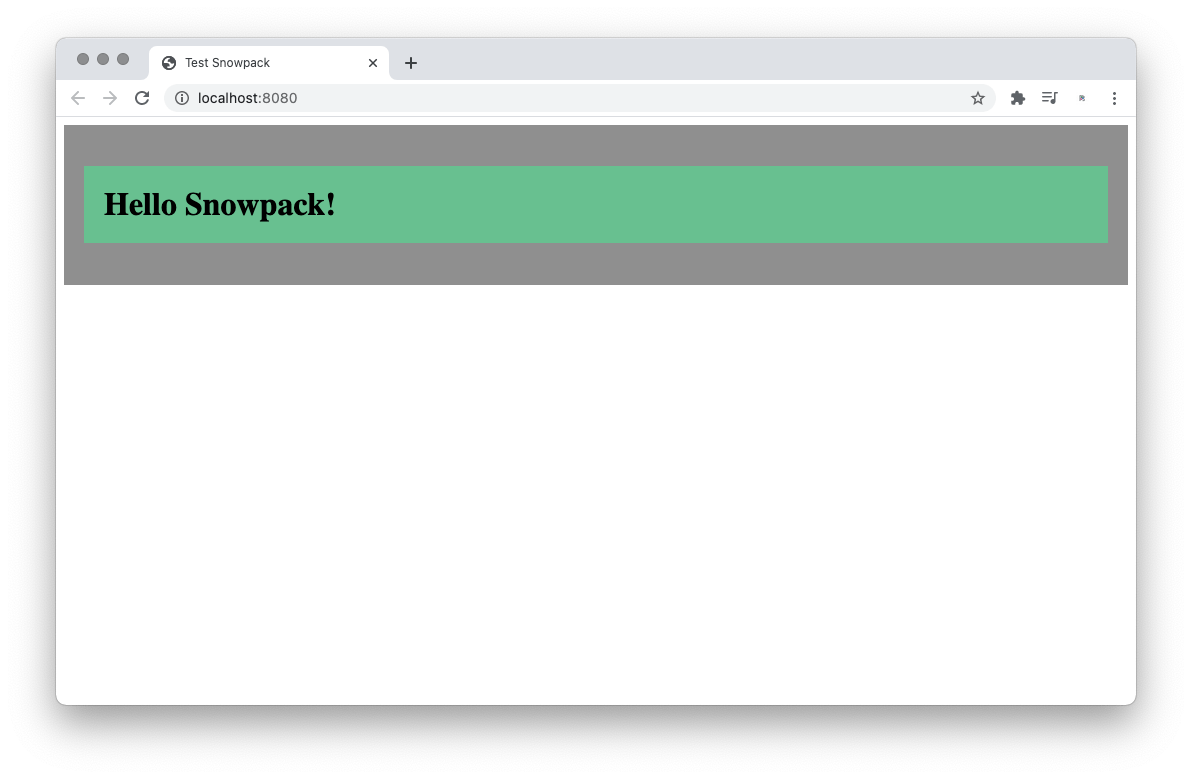
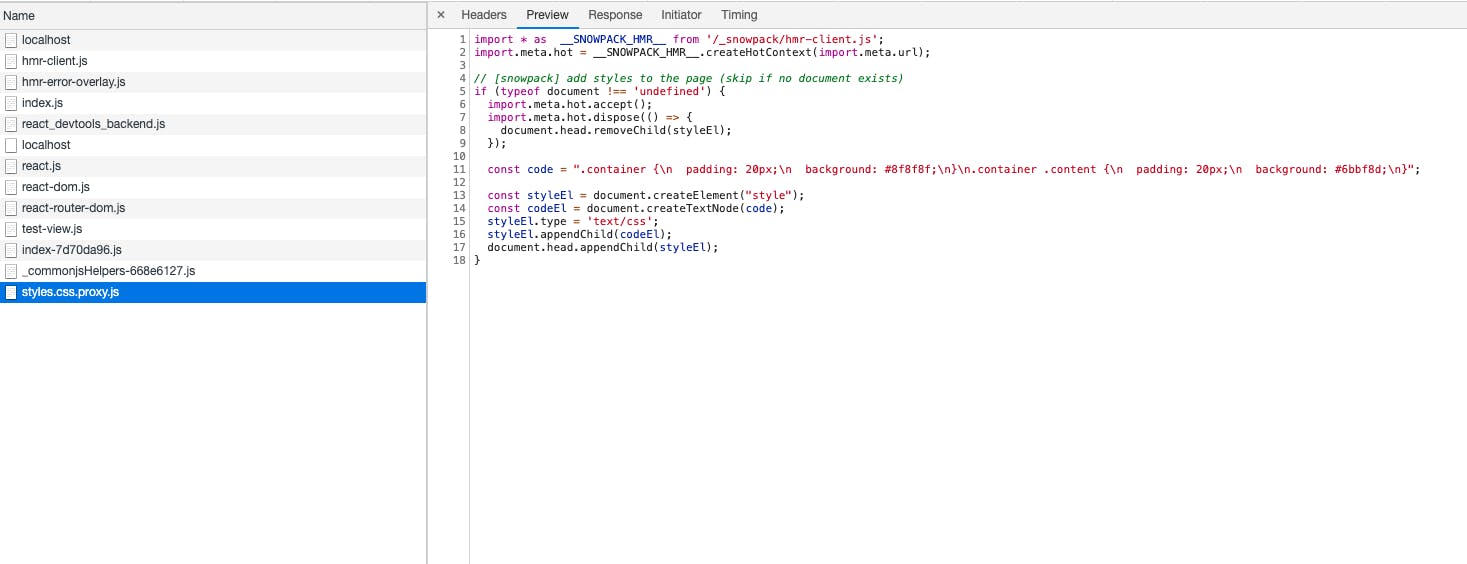
As you can, the style is built and pushed to the browser as a JavaScript file, which all it does is to create a <style> tag in the <head> of the HTML file and add the styles to it:
What about concatenation and minification?
You may be familiar with the notion that serving multiple files to the browser is bad practice because of poor performance, therefore you need to concatenate and minify into as few file bundles as possible.
That was true before HTTP/2 was widely adopted by browsers. In all fairness, it is still true today to some degree.
Serving multiple smaller files through HTTP/2 will still result in a larger request overhead than serving a few concatenated file bundles, but the overhead is negligible unless the performance is paramount for your application.
Bundling still has its place and is still important, mainly, because unbundled smaller files compress poorly than larger bundled ones. Then again, if it's set up correctly, browsers can cache these smaller assets indefinitely which means you only need to transfer them to the client once.
There are no clear-cut answers regarding this topic, the best bet is to measure the performance and weigh the pros and cons of bundling your files or not.
If you still want to bundle your files, Snowpack lets you use its built-in bundler or use existing bundlers like Webpack or Rollup to create the final production build. For more information see https://www.snowpack.dev/guides/optimize-and-bundle.
Snowpack's built-in bundler is using esbuild which is a really fast bundler written in Go, but as of this writing is not production-ready yet, although you can use it for smaller projects without any major bugs.
Using Skypack
Taking the build process even further, Snowpack has another trick up its sleeve called Skypack.
Skypack is a CDN that hosts already pre-built NPM modules wrapped in ESM to be able to use it in the browser. The modules are already minified, optimized, compressed, and set up for the browser to be able to cache them indefinitely.
It also supports HTTP/2, HTTP/3, edge caches, Brotli compression, and hosts all the major modules that are available on NPM.
Rewriting the app
Let's see how we can rewrite the app to take advantage of Skypack.
Remove all the dependencies from package.json, specifically React, React DOM and React Router.
yarn remove react react-dom react-router
Let's change our import statements in the source code too.
Modify src/index.jsx import statements like so:
// src/index.jsx
import React from 'https://cdn.skypack.dev/react'
import { render } from 'https://cdn.skypack.dev/react-dom'
import { BrowserRouter as Router, Switch, Route } from "https://cdn.skypack.dev/react-router-dom"
Note: React Router needs to load the BrowserRouter from react-router-dom module and not react-router.
Modify src/test-view.jsx:
//src/test-view.jsx
import React from 'https://cdn.skypack.dev/react'
That's it, it now loads the dependencies from Skypack. Let's see it in action in Chrome DevTools.
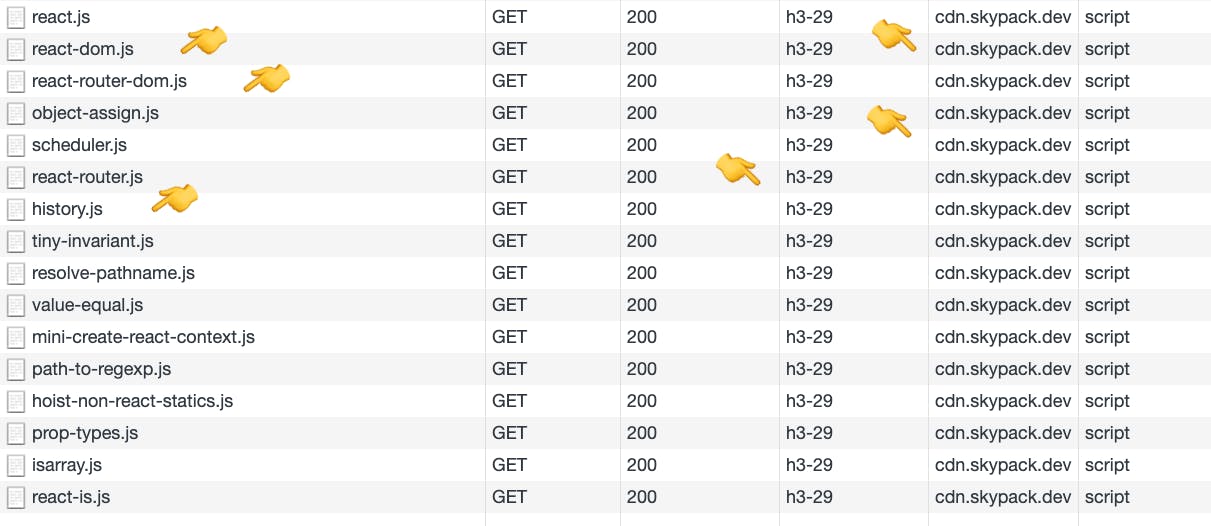
As you can see, Skypack is clever enough to resolve all the indirect dependencies too and push those scripts to the browser as well, like history.js or object-asssign.js.
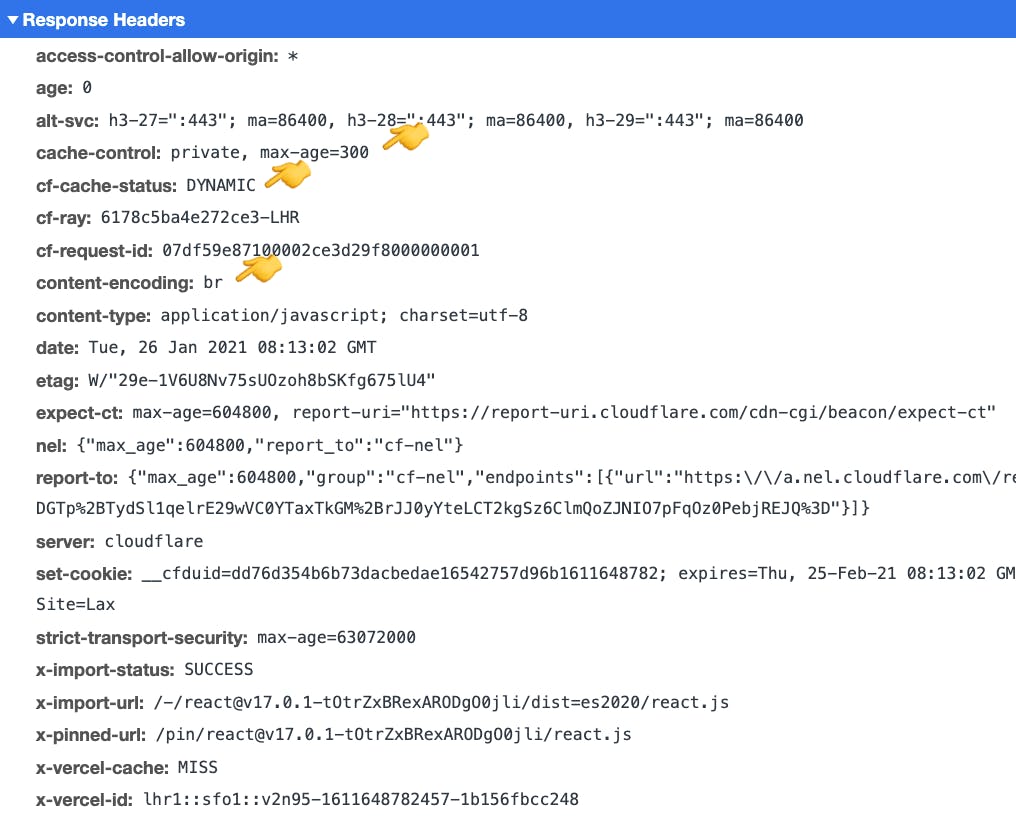
Also, note that it's using HTTP/3, it's cached and using Brotli compression in Chrome, which is a nice addition.
Optimizing Skypack for Production
Skypack has this notion of lookup and pinned URLs. A Lookup URL is what you saw above in the form of https://cdn.skypack.dev/react, this URL always serves the latest version of React every time you request it, which is not good at all in production because if the React team introduces a breaking change to the code our app could break too.
A pinned URL is an optimized version of the lookup URL which locks down the module version and serves you the exact same code every time you request it. To find the pinned URL just go to the lookup URL for React on that page you'll see a normal version and a minified version for the React module.
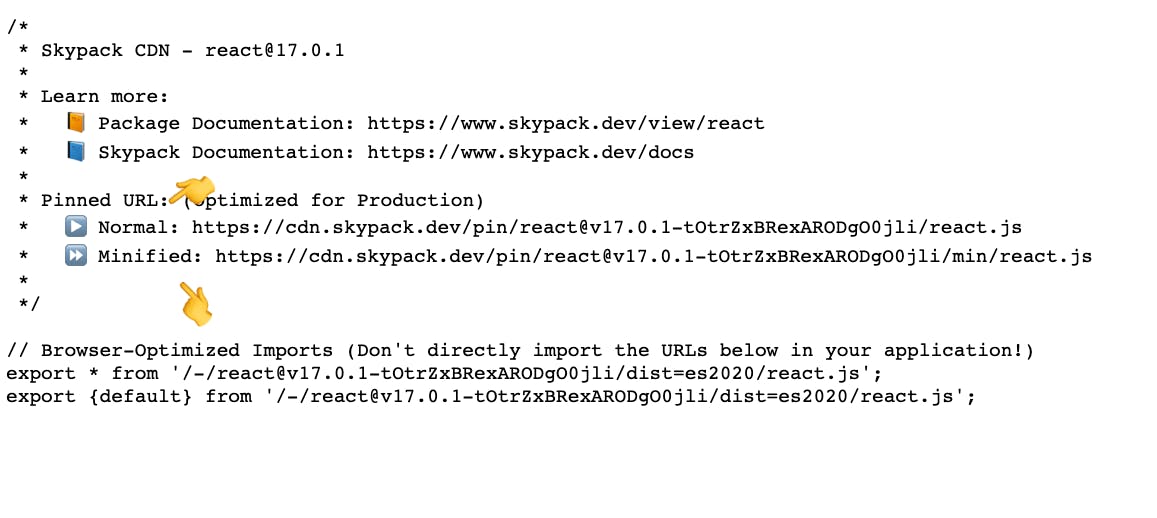
Let's look up the rest of the pinned URLs (which are created on a successful lookup URL request), and modify our code again.
Modify src/index.jsx and src/test-view.jsx import statements like so:
// src/index.jsx
import React from 'https://cdn.skypack.dev/pin/react@v17.0.1-tOtrZxBRexARODgO0jli/min/react.js'
import { render } from 'https://cdn.skypack.dev/pin/react-dom@v17.0.1-DtIXT56q6U8PbgLMrBhE/min/react-dom.js'
import { BrowserRouter as Router, Switch, Route } from "https://cdn.skypack.dev/pin/react-router-dom@v5.2.0-7NPRxD2JoKcEDKk1zroV/min/react-router-dom.js"
// src/test-view.jsx
import React from 'https://cdn.skypack.dev/pin/react@v17.0.1-tOtrZxBRexARODgO0jli/min/react.js'
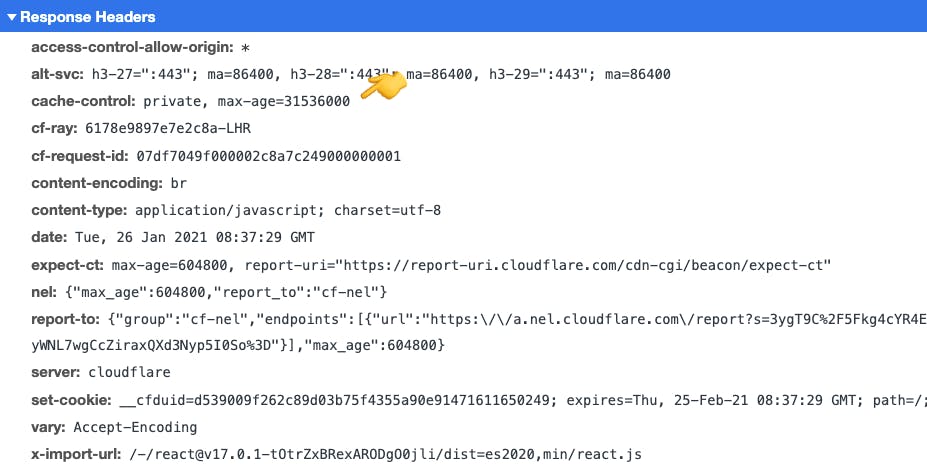
Reload the app in the browser to see the newly downloaded scripts, as you can see the module is minified and cached for 365 days.
Conclusion
Snowpack is not trying to be "yet-another-bundler", instead it re-imagines how we write front-end code today and fixes the pain points of development tooling.
With the addition of Skypack, it has the potential of becoming the de-facto front-end code builder and bundler of the future.
Once major browsers widely adopt import maps it will unlock a whole range of strategies a front-end developer can build and bundle code.
Github Repository
The Github repository that contains the full source code presented in this article can be found here https://github.com/primalskill/test-snowpack.
I hope you enjoyed this article, if you like it, please consider sharing, it would help the blog greatly. If you have any questions you can ask here in the comments section below or @ me on Twitter.

